# Running Enlightn
# Enlightn Command
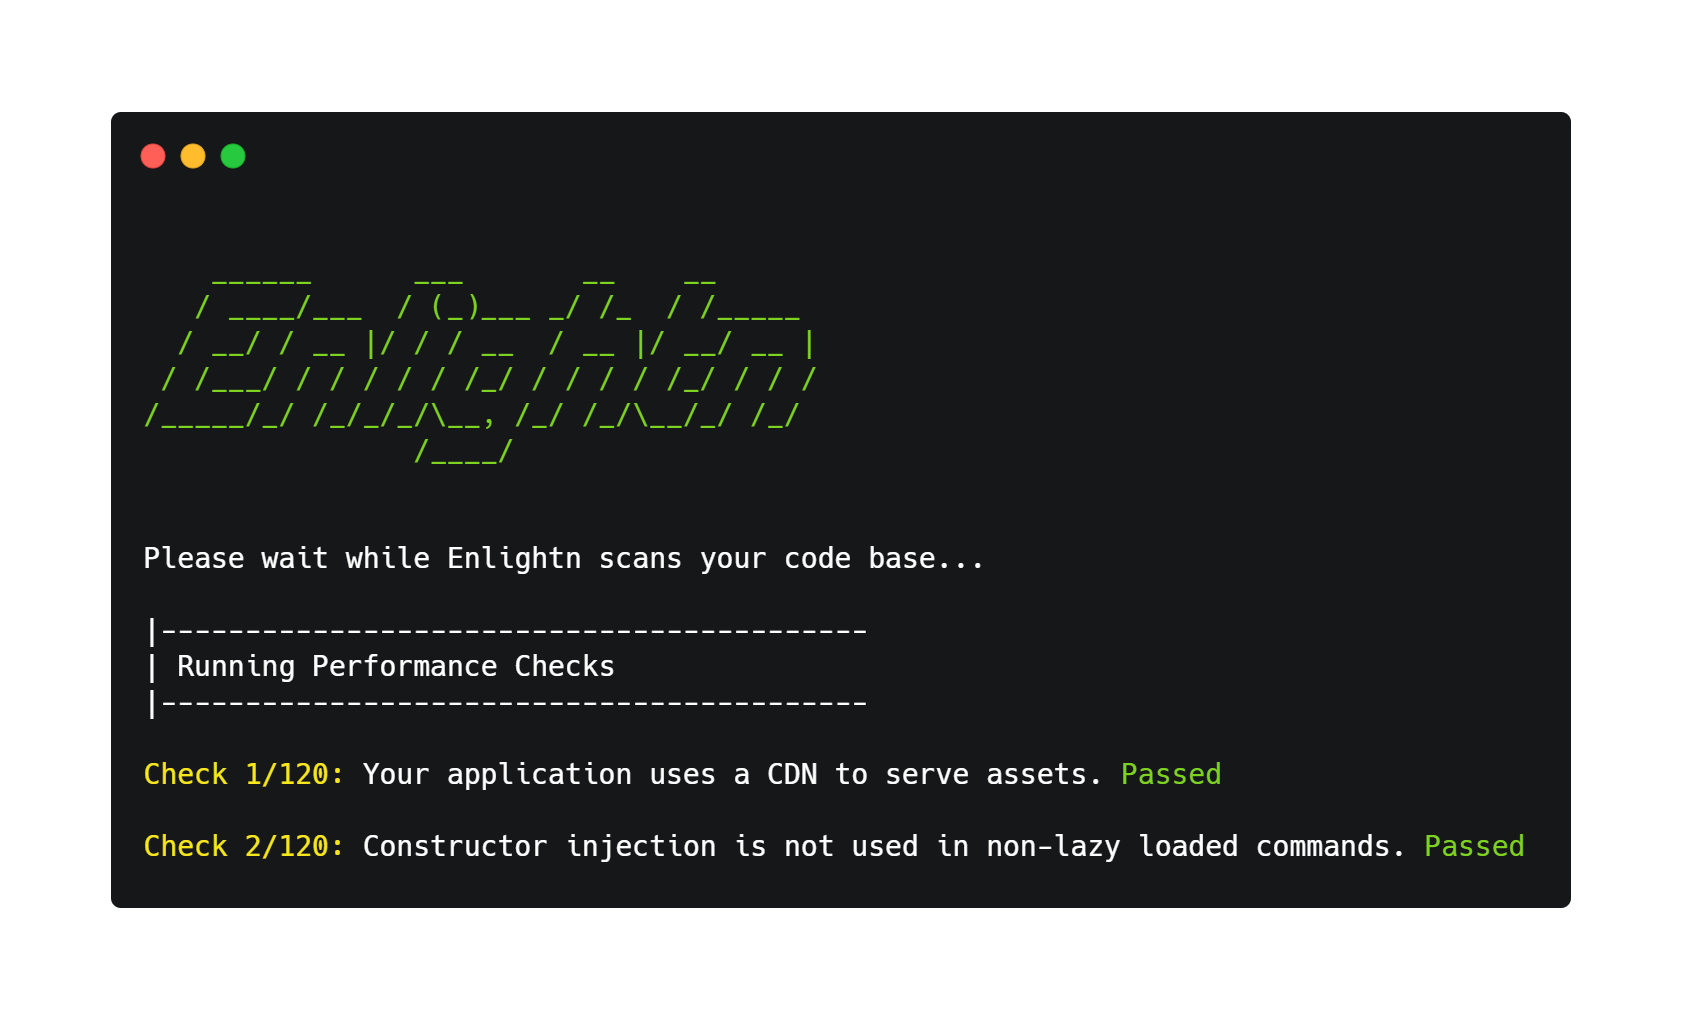
After installing Enlightn, simply run the enlightn Artisan command to run Enlightn:
php artisan enlightn
The enlightn command will return a 0 status code for success and a 1 status code if any of the analyzers fail. This may be useful if you wish to integrate Enlightn with your CI/CD tool.
# Failed Checks
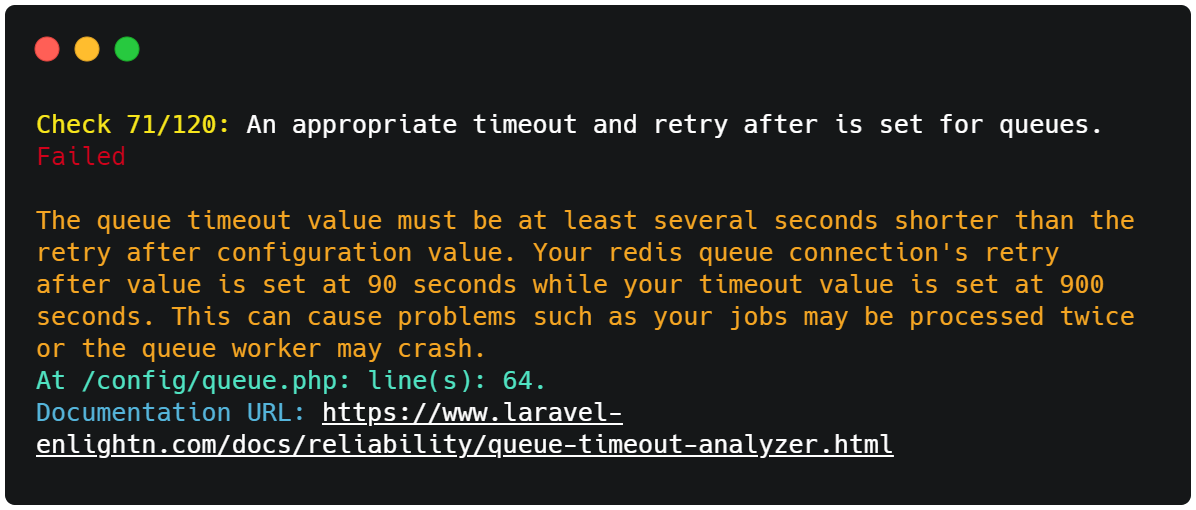
All checks that fail will include a description of why they failed along with the associated lines of code (if applicable).
# View Detailed Error Messages
By default, the enlightn Artisan command highlights the file paths, associated line numbers and a message for each failed check. If you wish to display detailed error messages for each line, you may use the --details option:
php artisan enlightn --details
# Report Card
Finally, after all the checks have run, the enlightn Artisan command will output a report card, which contains information on how many and what percentage of checks passed, failed or were skipped.
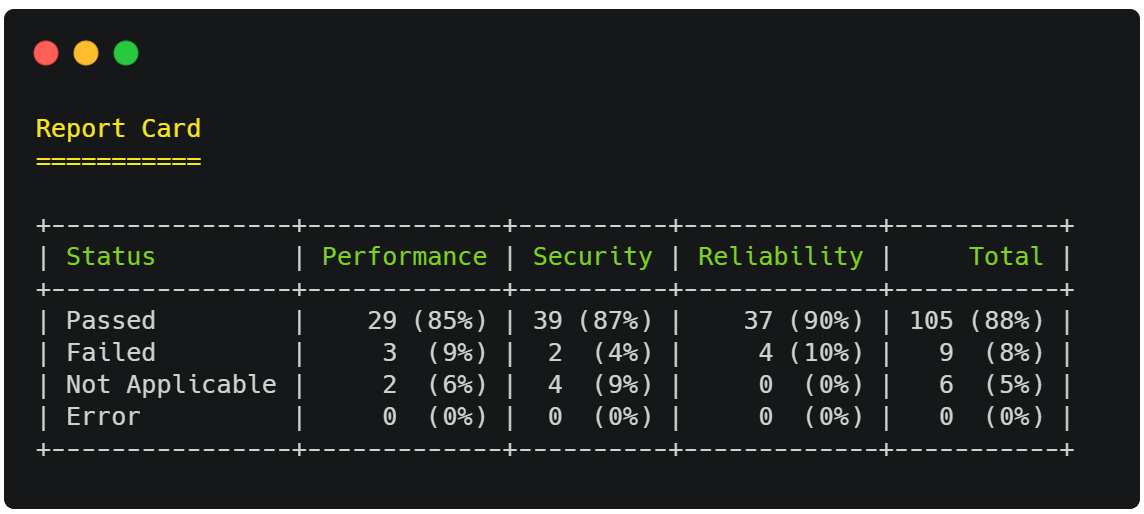
The checks indicated as "Not Applicable" were not applicable to your specific application and were skipped. For instance, the CSRF analyzer is not applicable for stateless applications.
The checks reported under the "Error" row indicate the analyzers that failed with exceptions during the analysis. Normally, this should not happen but if it does, the associated error message will be displayed and may have something to do with your application. See the section below on how to display the full stack trace of these exceptions.
# Displaying Exception Stack Trace
If some of the checks are reported under the "Error" row in your report card as mentioned above, then you may use the --show-exceptions option to display the full stack trace of the exceptions thrown during the analysis. This should have something to do with your application and viewing the stack trace will allow you to easily debug them.
php artisan enlightn --show-exceptions
# Enlightn Web UI
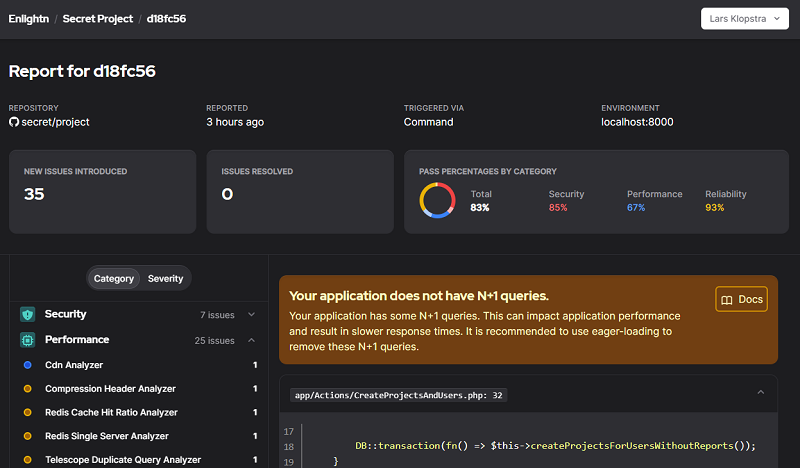
Enlightn provides a beautiful web UI dashboard where you can view your Enlightn reports triggered from your CI or scheduled command runs. Visit the Enlightn Web UI section for more info.
You may add the --report flag, if you wish to view your reports in the Enlightn Web UI besides the terminal:
php artisan enlightn --report
For the Enlightn Web UI reporting, Enlightn automatically picks the commit ID from the command line. However, in certain cases, you may want to supply a custom commit hash. You may do so using the --hash optional flag:
php artisan enlightn --report --hash=47c1ad9
# Running Specific Analyzers
If you wish to run specific analyzer classes, you may specify them as optional arguments:
php artisan enlightn Enlightn\\Enlightn\\Analyzers\\Security\\CSRFAnalyzer Enlightn\\EnlightnPro\\Analyzers\\Security\\DirectoryTraversalAnalyzer
Note that the class names should be fully qualified and escaped with double slashes as above.
# Before Running Callback
If you wish to execute some code before Enlightn runs its analyzer checks, you can register a "beforeRunning" callback like so:
use Enlightn\Enlightn\Enlightn;

// In the boot method of your AppServiceProvider
Enlightn::beforeRunning(function () {
    // preload code here.
});
This may be useful for some applications (such as multi-tenancy apps (opens new window)) that need to run some "preload" code affecting the configuration values, middleware or route registrations.
# Recommended To Run In Production
If you want to get the full Enlightn experience, it is recommended that you at least run Enlightn once in production. This is because several of Enlightn's checks are environment specific. So they may only be triggered when your app environment is production.
In case you don't want to run on production, you can simulate a production environment by setting your APP_ENV to production, setting up services and config as close to production as possible and running your production deployment script locally. Then run the Enlightn Artisan command.
# Authentication
# Credentials for the Web UI
Add your project credentials (API token and email) in the config/enlightn.php file before you run the Enlightn command with the --report flag. You may obtain these credentials after a free signup on the Enlightn website as described here.
# Authenticating Enlightn Pro in CI Environments
To authenticate Enlightn Pro in your CI environment, you can use Composer to set your credentials using environment variables like so:
composer config http-basic.satis.laravel-enlightn.com "$ENLIGHTN_USERNAME" "$ENLIGHTN_API_TOKEN"
Remember to configure these environment variables as "secrets" in your CI/CD tool. For instance, for Github actions, you can configure your Composer install step similar to the following:
- name: Install dependencies
  env:
    ENLIGHTN_USERNAME: ${{ secrets.ENLIGHTN_USERNAME }}
    ENLIGHTN_API_TOKEN: ${{ secrets.ENLIGHTN_API_TOKEN }}
  run: |
    composer config http-basic.satis.laravel-enlightn.com "$ENLIGHTN_USERNAME" "$ENLIGHTN_API_TOKEN"
    composer install --prefer-dist --no-interaction --no-progress --no-scripts
# Authenticating Enlightn Pro in Immutable Environments
You can set the COMPOSER_AUTH env parameter in immutable infrastructures (Heroku, Scalingo, etc.) to provide credentials to Composer:
{
    "http-basic":{
        "satis.laravel-enlightn.com":{
            "username":"YOUR ENLIGHTN USERNAME",
            "password":"YOUR ENLIGHTN API TOKEN"
        }
    }
}
# Usage in CI Environments
# CI Mode Command Line Options
If you wish to integrate Enlightn with your CI, you can simply trigger the --ci option when running Enlightn in your CI/CD tool:
php artisan enlightn --ci
You may add the --report flag if you wish to view your CI reports in the Enlightn Web UI. Remember to add your project credentials to your config/enlightn.php file as explained here.
php artisan enlightn --ci --report
Enlightn pre-configures which analyzers can be run in CI mode for you. So, the above commands exclude analyzers that need a full setup to run (e.g. analyzers using dynamic analysis).
You can additionally exclude analyzers in CI mode (besides the ones pre-configured by Enlightn) using the ci_mode_exclude_analyzers configuration option in your config/enlightn.php file.
If you wish to completely override the list of analyzers that run in CI mode, you can use the ci_mode_analyzers configuration option like so:
// In your config/enlightn.php file
'ci_mode_analyzers' => [
    Enlightn\Enlightn\Analyzers\Performance\CollectionCallAnalyzer::class,
    Enlightn\Enlightn\Analyzers\Performance\EnvCallAnalyzer::class,
    ...
],
You may want to copy your .env.example file to .env before you run Enlightn in CI mode. Some of Enlightn's analyzers check configurations, and so they may need a .env file present.
An example of a Github actions step on running the Enlightn command is as follows:
- name: Run Enlightn Checks
  run: |
    cp .env.example .env
    php artisan enlightn --ci --report
# Establishing a Baseline
Sometimes, especially in CI environments, you may want to declare the currently reported list of errors as the "baseline". This means that the current errors will not be reported in subsequent runs and only new errors will be flagged.
To generate the baseline automatically, you may run the enlightn:baseline Artisan command:
php artisan enlightn:baseline
This command automatically changes the dont_report and ignore_errors configuration options in your config/enlightn.php file such that all currently reported errors are ignored for subsequent runs.
If you wish to run this command in CI mode, you can use the --ci option:
php artisan enlightn:baseline --ci
This will generate the dont_report and ignore_errors configuration options by only considering the analyzers that run in CI mode.
# Scheduling Enlightn Runs
Besides integrating Enlightn with your CI/CD tool, it's a good practice to schedule an Enlightn run on a regular frequency (such as daily or weekly) like so:
// In your app/Console/Kernel.php file:

/**
 * Define the application's command schedule.
 *
 * @param  \Illuminate\Console\Scheduling\Schedule  $schedule
 * @return void
 */
protected function schedule(Schedule $schedule)
{
    $schedule->command('enlightn --report')->runInBackground()->daily()->at('01:00');
}
This will allow you to monitor Enlightn's dynamic analysis checks, which are typically excluded from CI. The reports can be viewed on the Enlightn Web UI.
Remember to add your project credentials, which can be obtained for free as described here.
# How Frequently Should I Run Enlightn?
A good practice would be to run Enlightn every time you are deploying code or pushing a new release. It is recommended to integrate Enlightn with your CI/CD tool so that it is triggered for every push or new release.
Besides the automated CI checks, you might also want to run Enlightn on a regular frequency using a scheduled console command as described here. This will allow you to monitor the dynamic analysis checks, which are typically excluded from CI.